| The Pre-Slope ( click on any image to enlarge it ) |
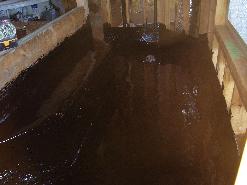
The first step to installing a proper Shower Pan is to create a slope ( 1/4 inch per foot ) towards the drain. I do this by troweling in a Dry-pack Mortar Bed. The mortar is first troweled in dry ( image 1 ), and then wet just enough to allow the mortar to cure ( image 2 ). By using the Dry-Pack method, rather than pre-mixing the mortar, we can install the Hot-Mop
over the pre-slope within a matter of minutes.
Note: The Pre-Slope is VERY important. Without it, any moisture that works its way to the Hot Mop would have no where to go. Over time the moisture would build up bacteria and MOLD, that eventually come up through the grout joints.
In CALIFORNIA, PRE-SLOPING THE SHOWER PAN IS REQUIRED BY CODE.
|
 |
| Image 1 |
|
|
 |
| Image 2 |
|
|
| The Hot Mop Pan ( click on any image to enlarge it ) |
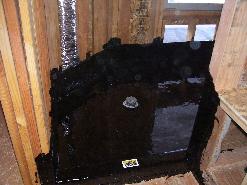
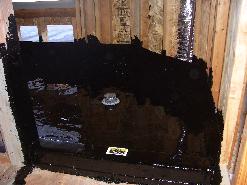
Before mopping, I always make sure to protect the area outside of the shower stall, so that in the end, you get a nice clean Hot Mop job, and the tar is only where it should be. Also, before mopping, the top flange of the drain is removed. Hot Mop must always sit between the two drain flanges. The Hot Mop consists of Three Layers Of 15# felt paper, with hot tar before, between, and after each layer. In Image 3, you can see the first layer of Hot Mop being installed. My Hot Mop corners are always very tight, with no air space underneath them, making the Hot-Mop very hard to damage, and also makes a nice surface for the Tile Man to work over. After the three layers of felt are in, fiberglass mesh is put in the corners to strengthen them. The top flange of the drain is then put back on, sandwiching the Hot Mop between the two flanges, creating a water-tight seal ( Image 4 ). After all of this is in, a final coat of Hot Mop ( called the "flood coat" ) is mopped over the entire shower pan, being sure not to get any in the Weep-Holes of the drain (Image 5 ). The Weep-Holes are small holes located on the top flange of the drain assembly. With a proper Pre-Slope, and by not clogging the Weep-Holes, any water that reaches the Hot-Mop will work its way toward the Weep-Holes, allowing it to escape into the drain line. After the flood coat is finished, clean up is done, and the shower pan is filled with water to test for leaks. The final product is a 100% water-proof Shower Pan guaranteed to pass city inspection.
|
 |
| Image 3 - Starting the Hot-Mop process |
|
|
 |
| Image 4 - Fiber-glass mesh and top flange of drain are installed |
|
|
 |
| Image 5 - Finished Hot-Mop with no tar in the Weep-Holes |
|
|
| The Final Product ( click on any image to enlarge it ) |
 |
| Shower Pan being filled with water for a leak test |
|
|
 |
| I place my business card on the curb when finished. If you have any problems, it is a quick way to find my PH #. |
|
|
 |
| Just another pic |
|
|
 |
| This is a 4 1/2 foot by 12 1/2 foot His and Hers shower. It has two seperate entrances, and a drain at each end. It was really fun Hot-Mopping this thing. |
|
|
 |
| His Entrance |
|
|
 |
| Her Entrance |
|
|
|